This article will walk you through aligning your dot matrix forms. AutoManager only supports four printer models for dot matrix printing. Before printing make sure you set you printer’s internal settings and assign the proper driver.
Step 1: First Time Print
After selecting your form from the forms list, you will see the margins tool. Keep the margins set at 0, 0 the first time you print the form.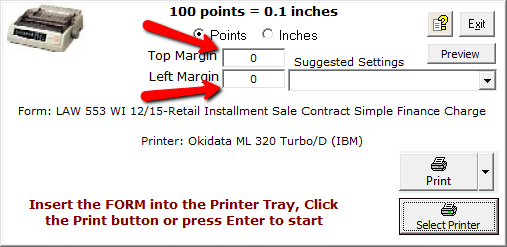
If it doesn’t print correctly the first time, that is to be expected.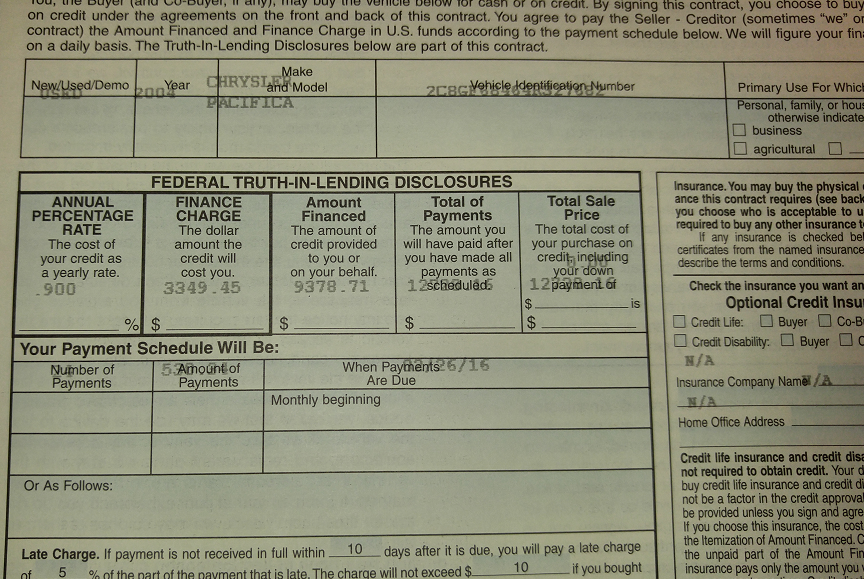
Step 2: Measuring the Text
When your form is done printing you can determine how far off your text is from where it is supposed to be. It is best to use a ruler at this point. Measure, in inches, how far and what direction your text is off. In this example, the text is printing approximately a quarter of an inch too high.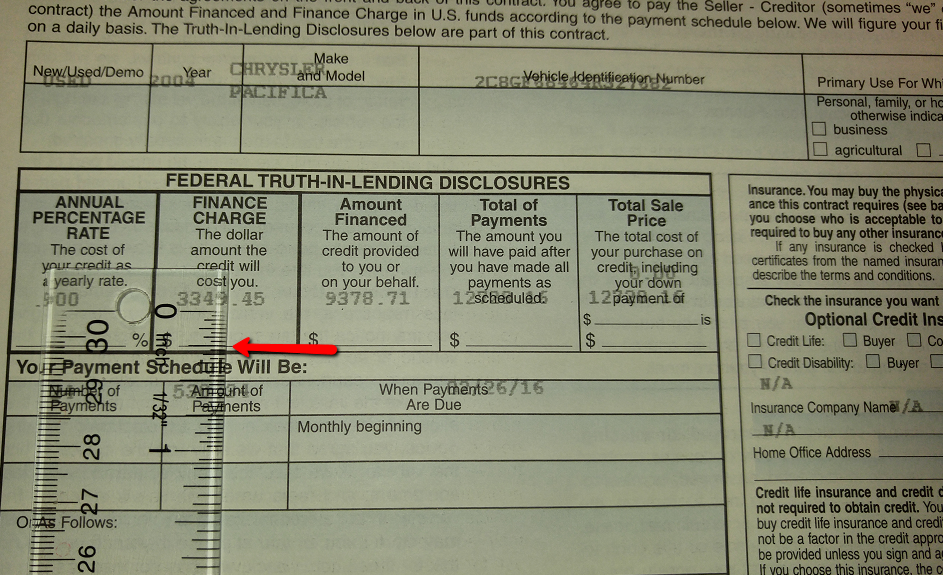 In the same example, the text is printing approximately 1/8 an inch too far to the left.
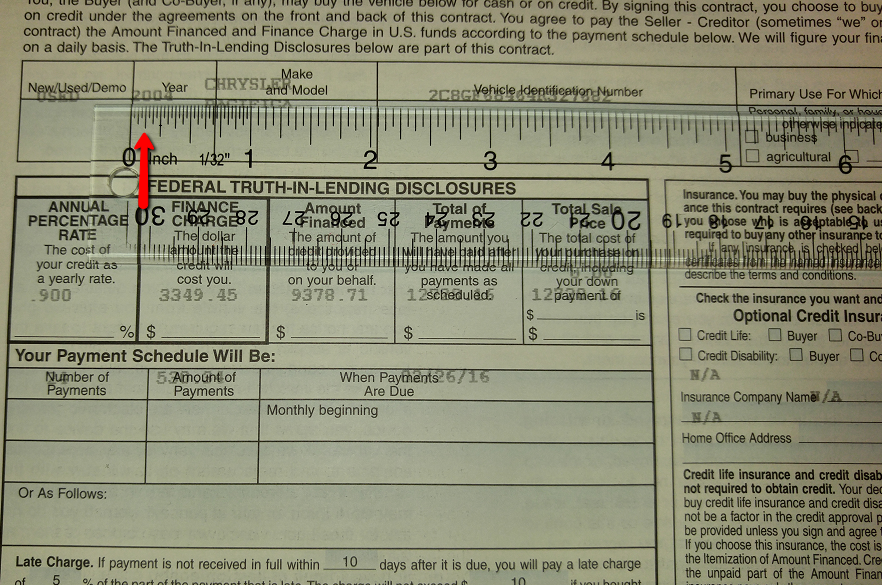
Step 3: Adjusting the Margins
When you go to print that form again you can input your margins. We give you a scale above where you input your margins telling you 100 points are equal to .1 inches.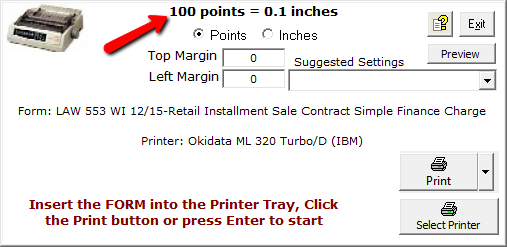
Putting a larger number into your Top Margin box will move your text down the page next time you print whereas putting a negative number will move it up the page. Likewise, putting a larger number into your Left Margin box will move your text to the right next time you print whereas putting a negative number will move it to the left.
Please note that a negative margin will only move the text over to a certain point before the text starts to get cut off
From the example above, the print job was approximately a quarter of an inch too high. With what we learned, you’ll want to enter 250 points to move the text down a quarter of an inch.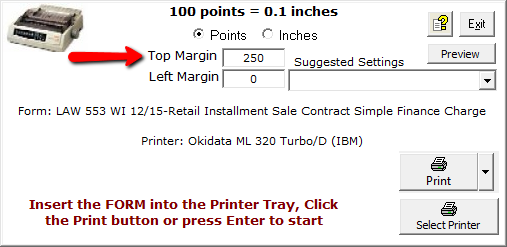
Again from the example above, the print job was approximately 1/8 of an inch too far to the left. You can enter 125 points to move the text 1/8 of an inch to the right.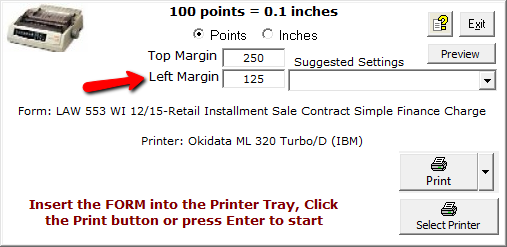
Using the margins in the example above, this is the result.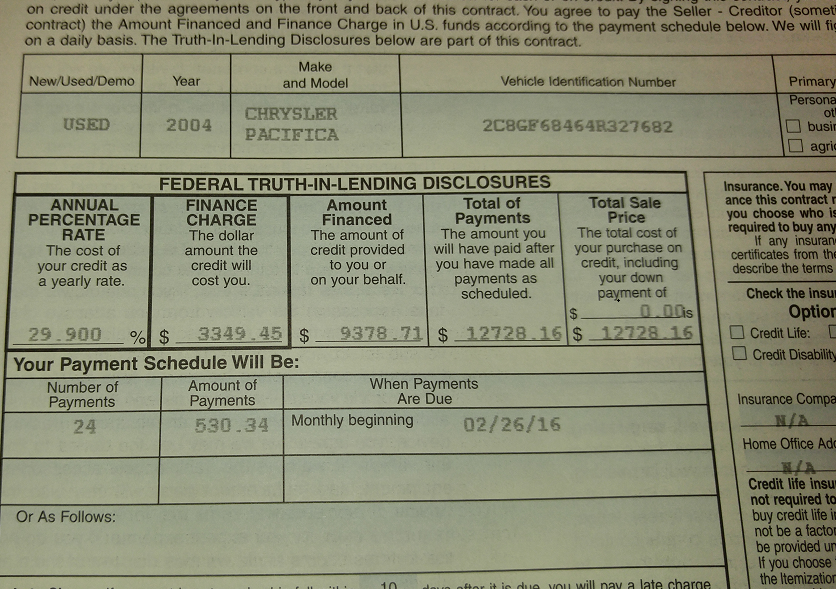
Comments
0 comments
Article is closed for comments.